 Visual overview of vagrant
 MediaWiki Vagrant logo
Bryan Davis explains in an interview at Wikimania what MediaWiki Vagrant is
TechTalk on MediaWiki-Vagrant by Bryan Davis and Dan Duvall
MediaWiki Vagrant logo
Bryan Davis explains in an interview at Wikimania what MediaWiki Vagrant is
TechTalk on MediaWiki-Vagrant by Bryan Davis and Dan Duvall
 Slides from TechTalk on MediaWiki-Vagrant by Bryan Davis and Dan Duvall
MediaWiki-Vagrant
is a portable MediaWiki development environment. It consists of a set of configuration scripts for
Vagrant
and
VirtualBox
that automate the creation of a virtual machine that runs MediaWiki.
Since the configuration is geared towards easy development rather than security, MediaWiki-Vagrant is not recommended for publicly accessible wikis.
The virtual machine that MediaWiki-Vagrant creates makes it easy to learn about, modify, and improve MediaWiki's code: useful debugging information is displayed by default, and various developer tools are set up specifically for inspecting and interacting with MediaWiki code, including a powerful debugger and an interactive interpreter.
Best of all, because the configuration is automated and contained in a virtual environment, mistakes are easy to undo.
System requirements
- CPU
- 64-bit x86 processor
- OS
- Linux
,
macOS
, or
Windows
- Memory
- At least 4 GiB RAM total on your system, preferably 8 GiB or more, in order to run both the host operating system and the VM.
Do not
attempt to run on a system with only 2 GiB RAM, it will eventually fail.
- Disk
- For complex installations, you must have 10?12?GB free on the primary drive (
/home
partition for Linux,
C:
drive for Windows). Note in particular that the VM disk images will be stored under your home directory by default.
- Network
- Active network connection with sufficient bandwidth to download Debian Linux updates and the MediaWiki source code.
- Time for setup
- 20 minutes to 2 hours, depending on conditions and if you have any troubles
Quick start
(If you are installing MediaWiki-Vagrant from the USB distribution, follow the steps in the README rather than the first five steps.)
- Get Git
- (Linux only) Install
NFS
if it is not already installed.
- In Ubuntu, use
sudo apt-get install nfs-kernel-server
.
- Fedora usually comes with NFS installed; if not, run
sudo dnf install nfs-utils
.
- Get VirtualBox
[1]
- Get Vagrant
. Note that Vagrant v2.3.7 is the last version licensed under a free license.
[2]
- Clone code into your current directory (don't clone into a folder in WSL)
[3]
$
git
 clone
 --recursive
 https://gerrit.wikimedia.org/r/mediawiki/vagrant
- Enter vagrant directory to run
vagrant
commands in:
- Run setup script to setup vagrant before starting the machine:
- Linux/macOS:
- Windows:
- When prompted, enter your
Gerrit
user name (recommended), or just press
? Enter
.
- If you want to use a release branch instead of the latest version, you can specify it now with
vagrant hiera mediawiki::branch REL1_27
- Start the virtual machine:
- Doing this for the first time might ask for your password as setting up directory sharing via NFS requires sysadmin rights. You can avoid that by setting the appropriate
sudo
permissions,
as described here
.
- Pay attention to the console output to make sure that there are no errors. If you bump into errors, the
#Troubleshooting startup
section may be helpful.
- Run the command
vagrant open
to open your MediaWiki instance. You can login with user
Admin
and password
vagrant
.
- Enable additional MediaWiki features and extensions.
- To see a list of features (vagrant roles) you can enable, run:
- To enable a feature, for example the
VisualEditor
, run:
$
vagrant
roles
enable
visualeditor
- To apply the roles you've enabled to your wiki, run:
vagrant up
fails if the default VirtualBox provider is used and the number of virtual CPUs on the host exceeds 32. Use
vagrant config vagrant_cores <number of cores>
to assign less than 32 of the cores to the VM.
It may take an hour or more before the first
vagrant up
completes.
Windows Subsystem for Linux (WSL)
If you are using the WSL Linux-compatible shell on Windows: run commands with
vagrant.exe
instead of
vagrant
. Run
vagrant.exe config --required
instead of
./setup.bat
, which does not work in the Linux bash shell.
The account running Vagrant will probably need the "Create Symbolic Links" permission (the easy way to achieve that is running as administrator).
Troubleshooting startup
If your issues are not answered here,
IRC
is a good option, specifically the
#wikimedia-tech
connect
channel.
- Sometimes you can fix broken installations (e.g. one saying
"No wiki found..."
by running
vagrant destroy; vagrant up
which will rebuild the virtual machine without repeating the most time-consuming parts of the installation process.
Any host
- You can try installing the versions of VirtualBox and Vagrant that your Linux distribution provides. If you're running recent Debian or Ubuntu, try
sudo apt-get install virtualbox vagrant
to install the packages for
VirtualBox
and Vagrant.
- If you get errors from
vagrant up
, instead install the most recent versions of VirtualBox and Vagrant.
- If you run into error message like "Couldn't open file $CLONED_REPOSITORY/trusty-cloud", try the following command:
vagrant up --provider=virtualbox
- If you got any puppet errors you might need to init puppet submodules, on vagrant directory run
git submodule update --init
Error:
Puppet
::
Parser
::
AST
::
Resource
failed with error ArgumentError: Could not find declared class
- Use
http://127.0.0.1:8080/info.php
to check that Apache/PHP is up and running.
You might want to compare the output of the initial run of
vagrant up
in your terminal with this
sample
. The initial setup may take a long time; if it seems to hang somewhere but there are no errors, just give it a while.
- If you get warnings that your VirtualBox Guest Additions are the wrong version, you can try installing the
vagrant-vbguest
plugin which updates them automatically.
- Vagrant rarely loses pairing with your VM.
This thread
discusses some ways to work around it (e.g. attaching old VM harddrive to the new profile)
- Make sure that
vagrant/mediawiki
repository is up to date:
$
cd
vagrant/mediawiki
$
git
pull
- Make sure that you have enabled virtualization in the BIOS. Sometimes this is under the Security settings.
- Make sure your language encoding settings are UTF-8. If you get "
invalid byte sequence in US-ASCII
", try (re)setting your LANG and LC_ALL environment variables to something suitable. For example:
export
LANG
=
en_US.UTF-8
export
LC_ALL
=
en_US.UTF-8
If you have deleted any old VMs you will see an error message like "...path contains non-directory or non-existent components..." and
vagrant up
will not complete. If you are using NFS (on a non-Windows host operating system), you should be able to fix this by removing
/etc/exports
: enter
sudo rm -i /etc/exports
Vagrant will recreate the
/etc/exports
file the next time you run
vagrant up
.
MediaWiki-Vagrant will not run on a host that doesn't support VT-X because it specifies a 64bit guest (virtual machine).
MediaWiki-Vagrant needs to run on a 64-bit virtual machine, in part because it uses use deb packages from WMF production that are only built for the amd64 architecture.
Windows-specific
- If you are on Windows and you get "guest machine entered an invalid state" - "poweroff", try downloading a 4.3.15 build of VirtualBox (
there is a known problem with 4.3.14 on Windows
). If that does not help, make sure you enable Hardware Virtualization Technology (VT-x or AMD-V) in BIOS. Hardware Virtualization is required. It is not an optional performance enhancement. (Some laptops require you to remove the power cable and battery for 30 seconds
[1]
)
- VirtualBox is incompatible with Microsoft's Hyper-V.
If you have Hyper-V enabled ? which may be the default if you have installed Visual Studio ? you'll get the above errors trying to boot up a VM in VirtualBox. There are three possibilities:
- In command prompt, run
bcdedit /set hypervisorlaunchtype off
to turn off Hyper-V and reboot. To turn Hyper-V back on set it back to
auto
instead of
off
- Disable Hyper-V through 'Add/Remove Windows Features' in Control Panel and reboot. This will get VirtualBox working, but will prevent you from using any Hyper-V VMs you may have, such as Windows Phone emulators.
- or, use the
Hyper-V provider
for Vagrant instead of VirtualBox. This may be unstable.
Mac-specific
- NFS errors
To avoid NFS errors, while installing, ensure the firewall will accept connections: Apple > System Preferences > Security & Privacy > Firewall > Firewall Options. You will need to UNcheck "Block all incoming connections" and probably also UNcheck "Enable stealth mode" in order to accept the following: netbiosd, nfsd, rpc.lockd, rpc.rquotad, rpcbind, VBoxHeadless. Note, you may need to restart your computer and change the status to "Allow incoming connections" during a couple
vagrant up
s. After installation, you may be able to re-check "Block all incoming connections and "Enable stealth mode" now that the firewall rules have been updated.
- Alternatively you can turn off NFS shares via
vagrant config nfs_shares off
Debian and Ubuntu
- MediaWiki-Vagrant uses
NFS
to share some folders with the host machine (your computer). You need to set up your computer as an "NFS server", see e.g.,
Ubuntu instructions
. On Debian,
sudo apt-get install nfs-kernel-server
will work; you may need to
modprobe nfsv3
as well.
Note that Debian's NFS server will not start without an entry in
/etc/exports
.
If
sudo rpcinfo -p
doesn't show "nfs" services running, this is likely what's going on. Adding your home directory as the last line in
/etc/exports
and then
/etc/init.d/nfs-kernel-server restart
will usually be good enough to get you past this chicken-and-egg problem.
- The NFS shares used by MediaWiki-Vagrant cannot be run from an encrypted directory, as may be the case if you are running on Ubuntu and using an encrypted home directory. To run MediaWiki-Vagrant, you can either:
- Move the MediaWiki-Vagrant directory to an unencrypted volume (e.g.,
/opt
) before running
vagrant up
- Alternatively, you can turn off NFS shares via
vagrant config nfs_shares off
- NFS setup seems to get stuck sometimes (initial
vagrant up
hangs at "Mounting NFS shared folders"). Restarting the NFS daemon on the host helps. (See
#5802
.)
- If you are getting port forwarding errors saying the ports are in use, you may need to open up VirtualBox, entirely remove the virtual machine, and try again.
vagrant up
may tell you that "The executable 'bsdtar' Vagrant is trying to run was not found in the PATH variable." You can fix this on Ubuntu with
sudo apt install libarchive-tools
.
- On Ubuntu with Secure Boot enabled, you will have a difficult time installing VirtualBox. Your machine may give you guff when you run
/sbin/vboxconfig
. If it does, you can rectify the situation by signing the associated kernel module. Step-by-step instructions can be found in
this askubuntu post
.
Fedora
- If you get
Network 10.11.12.13 is not available.
after running
vagrant up
, disable SELinux via
sudo setenforce 0
or fix your SELinux setup.
- If you get
The provider for this Vagrant-managed machine is reporting that it is not yet ready for SSH.
after running
vagrant roles enable mediawiki --provision
, make sure to explicitly set the provider, for example via
vagrant destroy
followed by
vagrant up --provider=virtualbox
- If you get
mount.nfs: mount to NFS server '10.11.12.13:download-directory/vagrant' failed: RPC Error: Unable to receive
, run
vagrant config nfs_shares
Basic usage
 Screenshot
The
vagrant
command-line tool on the host machine provides several subcommands for controlling your virtual machine. You've already used one:
vagrant up
, which turns on the virtual machine. Like most
vagrant
subcommands, you need to run it from the MediaWiki-Vagrant directory or one of its children. When you first run it, Vagrant will fetch a system image and set up requisite software for running MediaWiki. This can take 1?2 hours of CPU and wall clock time on a broadband connection, but it only needs to happen once. When you run
vagrant up
in the future, it will simply boot up the machine.
vagrant ssh
starts an interactive login shell on the virtual machine. It'll log you in as the user
vagrant
; root access is available to via
sudo
, which is passwordless. Because the virtual machine is entirely sandboxed within your computer, it is configured for convenience, not security. As a rule, whenever you encounter a password prompt, the password is
vagrant
.
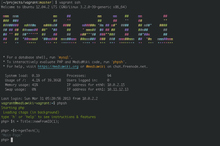
When you log in, you should see a colorful MediaWiki banner and a few reminders of useful commands.
The command
phpsh
will start an interactive PHP interpreter with MediaWiki's codebase already loaded. You can type in some code, hit 'enter', and the code will be evaluated immediately. If you start a line with '=', its computed value will be pretty-printed. Type
?
for quick help or
help start
for additional instructions.
The
/vagrant
folder corresponds to the MediaWiki-Vagrant folder on your host machine, and its contents is shared. MediaWiki's code is installed in
/vagrant/mediawiki
. This allows you to use your normal editor environment on your host machine to edit the MediaWiki code that runs on your virtual machine.
Updating
Use
vagrant git-update
to keep your git repositories, external libraries, and database schema up to date. This command is equivalent to running
- git pull
in
core
and all extension and skin directories
- composer update
to ensure that the latest Composer-managed libraries are available
- finally the
update.php
script.
You should also occasionally (or when needed for a new feature) update MediaWiki-Vagrant itself, which
vagrant git-update
does not include. Run:
… in your MediaWiki-Vagrant root directory. This will take effect when you run:
You can run that command immediately after you run
git pull
, or sometime after.
 Warning: Warning:
| If you update from git manually you may also need to run
composer update
to download external libraries required by MediaWiki. You can run the
checkComposerLockUpToDate.php
script to see if
composer update
is needed.
|
Some projects have NPM dependencies, often for development usage only, that are not installed by Composer. These may be approximately identified with
find -not \( -name node_modules -prune \) -name package.json
and manually installed as needed after an update by executing
npm install
in each directory wanted.
Log out of your virtual machine by typing
logout
or by pressing
Ctrl
+
D
.
Now that you're back in a standard command prompt, you can run
vagrant halt
to shut down the virtual machine and
vagrant up
to bring it back up.
vagrant destroy
will delete the virtual machine's files; this command is useful if you want to return your instance to a pristine state.
(You'll need to follow up with
vagrant up
to provision a fresh instance.)
Using roles
MediaWiki-Vagrant sets up a basic MediaWiki instance by default, but it also knows how to configure a range of complementary software, including some popular MediaWiki extensions and their dependencies.
These optional software stacks are collectively known as 'roles', and MediaWiki-Vagrant offers an easy and powerful command-line interface for managing them.
$
vagrant roles list
# Display a list of available roles.
$
vagrant roles enable
role
# Turn on
role
for this machine.
$
vagrant roles disable
role
# Turn off
role
for this machine.
$
vagrant provision
# After you are done enabling and/or disabling roles, run this to make the change take effect.
Watch a short
screencast
demonstrating how to use roles.
Roles
has more information about some roles.
If you add many roles, you may need to increase memory available to the Vagrant VM.
In particular, setting up the "browsertests" role involves compiling the
ffi
ruby Gem
which is a memory-hungry task; if it fails try freeing some memory in the VM or increasing its memory allocation (
bug 53864
).
See the section
Authoring roles
below if you're interested in adding roles to MediaWiki-Vagrant.
Troubleshooting specific roles
centralauth
There are some roles that require special attention, centralauth role does not run db migrations automatically via puppet and requires running those by hand. If you get errors on provisioning this role try to run this script on the extension and see the errors it outputs:
mwscript extensions/CentralAuth/maintenance/migrateAccount.php --username 'Admin' --auto
Once you get a more concrete error you probably need to know what migration you need to run from the ones here:
extensions/CentralAuth/db_patches
wikidata
A simple
vagrant roles enable wikidata && vagrant provision
would fail.
Here is a complete set of commands to make the Wikidata role up and running.
$
vagrant
 up
$
vagrant
git-update
$
vagrant
ssh
$
sudo
apt-get
update
&&
sudo
apt-get
upgrade
$
composer
selfupdate
--update-keys
$
composer
config
--global
process-timeout
9600
$
exit
$
vagrant
roles
enable
wikidata
$
vagrant
 provision
Note that the first provision may complain, thus looking like a failure. However, if you run a second provision, you will see that everything goes fine.
You may then point your browser to
http://wikidata.wiki.local.wmftest.net:8080/
. To create a new wikidata item load
http://wikidata.wiki.local.wmftest.net:8080/wiki/Special:NewItem
and to create a new property navigate to
http://wikidata.wiki.local.wmftest.net:8080/wiki/Special:NewProperty
How to import a Wikidata dump
The Vagrant command
import-dump
, which imports an XML file into MediaWiki, does not handle wikis other than the default one (see
phab:T183274#3893785
).
You need to run the
importDump.php
script
inside
the Vagrant box.
Here is the procedure to import
XML
dumps.
$
mkdir
wikidata_dumps
$
cd
wikidata_dumps
- download the
pages-articles
chunks. For instance:
$
wget
https://dumps.wikimedia.org/wikidatawiki/latest/wikidatawiki-latest-pages-articles10.xml-p5264684p6341661.bz2
- enable the import of Wikibase entities (see
phab:T72898#1588002
). Append the following line to your
LocalSettings.php
:
$
wgWBRepoSettings
[
'allowEntityImport'
]
=
true
;
- the following BASH script can help you monitor the process. You can paste it in a
import_wikidata.sh
file. Note that the highlighted line calls the actual import script:
#!/usr/bin/env bash
chunks
=
$(
find
wikidata_dumps
-type
f
)
for
chunk
in
$chunks
do
now
=
$(
date
)
echo
"
$now
: started import of
$chunk
"
>>
wd_import.log
echo
"-------------------------------------------"
>>
wd_import.log
bzcat
$chunk
|
mwscript
importDump.php
--wiki
=
wikidatawiki
--uploads
--debug
--report
10000
2
>>wd_import.log
now
=
$(
date
)
echo
"-------------------------------------------"
>>
wd_import.log
echo
"
$now
: completed import of
$chunk
"
>>
wd_import.log
echo
"==========================================="
>>
wd_import.log
done
- log into the Vagrant box and run the script. Debug messages should show up there:
$
vagrant
ssh
$
cd
/vagrant
$
sudo
chmod
+x
import_wikidata.sh
$
./import_wikidata.sh
- you can follow the progress log from outside the Vagrant box:
Additional suggestions
Speeding up MediaWiki on Windows
MediaWiki out-of-the-box will likely run slow (page loads take 5+ seconds).
This is because the virtual machine uses a shared file system that retrieves the files very slowly.
Enabling NFS on Windows by installing the Vagrant WinNFSd plugin with
vagrant plugin install vagrant-winnfsd
, enabling NFS shares with
vagrant config nfs_shares true
, and restarting the machine with
vagrant reload
should significantly speed up page load times.
You should make sure that the plugin is installed every time you run the machine as well.
[4]
You can further speed it up by enabling
nfs_cache
, however, be warned that your wiki may run into weird errors because some files may not be updated completely when using the cache.
You can also speed up Mediawiki by using
smb_shares
.
Make sure not to enable it at the same time as
nfs_shares
.
Enable it with
vagrant config smb_shares yes
and run
vagrant reload
in an shell run as an administrator.
If you don't run it as an administrator, you will be warned with an error when vagrant goes up and when you go to the wiki address, you will see a
Wiki not found
.
When prompted, type in the username of your account (the name of your home user directory) and password (your Microsoft account password if your account is not a local account with a normal password).
Local MediaWiki core copy
Sometimes you may want to start over from scratch by removing the entire
vagrant
directory or cleaning out the
vagrant/mediawiki
directory. In order to speed up the vagrant provisioning process, you may want to consider keeping a local, updated clone of the MediaWiki core that you copy into
vagrant/mediawiki
.
for example, assuming you are cloning MediaWiki repos into
~/projects/mediawiki/
:
# clone and store a clean copy of MediaWiki core in ~/projects/mediawiki/core
cd
~/projects/mediawiki/
git
clone
ssh://<your-gerrit-username>@gerrit.wikimedia.org:29418/mediawiki/core
# clone a clean copy of vagrant in ~/projects/mediawiki/vagrant
cd
~/projects/mediawiki
git
clone
ssh://<your-gerrit-username>@gerrit.wikimedia.org:29418/mediawiki/vagrant
# create the mediawiki subdirectory if it doesn't exist
cd
~/projects/mediawiki/vagrant
mkdir
~/projects/mediawiki/vagrant/mediawiki
# copy the clean MediaWiki core to the clean vagrant/mediawiki directory
cp
-r
~/projects/mediawiki/core/
~/projects/mediawiki/vagrant/mediawiki
Update cloned repos
Update the cloned repos as often as possible/necessary.
cd
~/projects/mediawiki/core
git
 pull
cd
~/projects/mediawiki/vagrant
git
pull
git
submodule
update
--init
--recursive
Or to update all cloned repos:
Vagrant reload
If you change configuration (e.g.
vagrant_ram
, your VM/MediaWiki website freezes, or you experience a problem,
vagrant reload
may resolve it.
This will restart your guest.
Some roles also require reloading, which should happen automatically.
When to enable roles
Enable roles only once you've successfully run your first
vagrant up
.
Note that
vagrant destroy
will
not
reset the enabled roles. Be sure to disable all roles after running
vagrant destroy
, then run
vagrant up
. Then you can re-enable any roles and run
vagrant
 provision
.
Vagrant behind proxy
If you are behind a proxy, Vagrant might throw some
errors
.
You can install
vagrant-proxyconf
.
It’s a plugin that allows your virtual machine to use specified proxies.
This is a quick set up guide.
For a detailed documentation you may check
here
.
Install the plugin:
vagrant
plugin
install
vagrant-proxyconf
To configure proxy settings for all pieces of software on all vagrant VMs, add the following lines to your
$VAGRANT_HOME/Vagrantfile
(default
~/.vagrant.d/Vagrantfile
).
Vagrant.configure
(
"2"
)
do
|
config
|
if
Vagrant.has_plugin?
(
"vagrant-proxyconf"
)
config.proxy.http
=
"http://192.168.0.2:3128/"
config.proxy.https
=
"http://192.168.0.2:3128/"
config.proxy.no_proxy
=
"localhost,127.0.0.1,.example.com"
end
# ... other stuff
end
Replace the addresses with the IP and port number of your proxy server.
Use the
config.proxy.no_proxy
option to list out all the sites/domains for which you might want to bypass proxy. For example,
config.proxy.no_proxy
=
"localhost,127.0.0.1,.example.com,.someinternaldomain.com"
Now when you run a
vagrant up
, there shouldn’t be any warnings.
To disable the plugin, set
config.proxy.enabled
to
false
or empty string
("")
.
You can also disable it for specific applications. For example,
config.proxy.enabled
# → all applications enabled(default)
config.proxy.enabled
=
true
# → all applications enabled
config.proxy.enabled
=
{
svn:
false,
docker:
false
}
# → specific applications disabled
config.proxy.enabled
=
""
# → all applications disabled
config.proxy.enabled
=
false
# → all applications disabled
MediaWiki-Vagrant prep
You may want to consider using a shell script such as
mw-vagrant-prep
to prepare a directory for a MediaWiki-Vagrant install.
Debugging
Vagrant
You can debug MediaWiki-Vagrant itself (e.g. the errors that happen during
vagrant up
) with
VAGRANT_LOG
:
VAGRANT_LOG
=
debug
vagrant
up
Provisioning
You can debug the provisioning process by running
PUPPET_DEBUG
=
1
vagrant
provision
PHP
You can debug PHP with Xdebug. Debugging in PHP is different from other client-side debugging. Your IDE listens for incoming connections, and when you access the server with a browser, a special header instructs PHP to connect to your IDE. See
MediaWiki-Vagrant/Advanced usage#MediaWiki debugging using Xdebug and an IDE in your host
for further information.
Chrome
- For Chrome users, you should get
XDebug Helper
, and optionally
Clear Cache
,
HTTP headers
, and
Mod Headers
. Configure clear cache to automatically reload after clearing, and set up keyboard shortcuts (e.g.
Ctrl
+
R
for clear&reload,
Ctrl
+
? Shift
+
D
to switch XDebugger on/off)
Firefox
- Firefox users should check out
easy Xdebug
.
- Install and configure an
xdebug-compatible
IDE on your machine (Eclipse, PhpStorm, Emacs, etc.)
- In IDE, start listening for the incoming debug connection
- In IDE, set break point at the spot that interests you
- Enable XDebug in the browser and navigate to your vagrant installation ( http://127.0.0.1:8080/... )
Log files
The MediaWiki logs can be found in
/vagrant/logs
.
There are log files for Apache in
/var/log/apache2/
, but it seems they are not written to.
The MySQL query log can be obtained by issuing
SET GLOBAL general_log = 'ON';
in a client and then looking at
/var/lib/mysql/*.log
.
Running and debugging unit tests
To
run
the
PHPUnit
tests for ALL extensions:
$
vagrant
ssh
$
cd
/vagrant/mediawiki
$
sudo
-u
www-data
env
"PHPUNIT_WIKI=wiki"
composer
phpunit:entrypoint
To run unit tests for a single extension:
$
sudo
-u
www-data
env
"PHPUNIT_WIKI=wiki"
"PHP_IDE_CONFIG=serverName=mwvagrant"
"CIRRUS_REBUILD_FIXTURES=yes"
"XDEBUG_CONFIG=idekey=netbeans-xdebug"
composer
phpunit:entrypoint
--
--stop-on-failure
--stop-on-error
extensions/ExtensionName/tests/phpunit/
You can append
path/to/tests/to/run
.
Some tests may require running as the proper user to create lock files and such, hence this command runs as the "user"
www-data
that handles web requests.
For building coverage reports, see
Manual:PHP unit testing/Code coverage#MediaWiki-Vagrant
.
Debugging phpunit tests is a little more complex.
This method is a bit hacky, but can be used until debugging remote interpreter improves (e.g. in phpStorm 8 EAP).
This workaround lets you run MediaWiki unit tests from the browser.
- Download
phpunit.phar
file to the root of your vagrant directory.
- Create a php file
unittest.php
in the root of the
mediawiki
directory. Do not commit this file to the repository. Paste the following code into it:
|
|
<html><body><pre>
<?php
error_reporting
(
E_ALL
);
ini_set
(
'display_errors'
,
1
);
require_once
'includes/WebStart.php'
;
$_SERVER
[
'argv'
]
=
array
(
'--configuration'
,
'/vagrant/mediawiki/tests/phpunit/suite.xml'
,
'/vagrant/mediawiki/extensions/JsonConfig/tests/phpunit/JCObjContentTest.php'
,
);
require_once
'/vagrant/mediawiki/tests/TestsAutoLoader.php'
;
require_once
'/vagrant/phpunit.phar'
;
PHPUnit_TextUI_Command
::
main
(
false
);
|
- In the above file, change
argv
parameter to the name of your test file
- Apache maps the root of the MediaWiki directory to
/w
. So navigate to
http://127.0.0.1:8080/w/unittest.php
to run this file
- Follow
#Debugging
instructions to attach your debugger
Running browser tests
For JavaScript unit tests (QUnit), see
Manual:JavaScript unit testing
.
For browser end-to-end tests (Selenium), see
Quality Assurance/Browser testing/Running tests#Running VisualEditor browser tests via Vagrant
Pushing commits
If you're using MediaWiki-Vagrant for development you'll probably want to push some commits to MediaWiki core or an extension's repository using
git review
. By default, all remotes point to the
https://
URLs. To avoid overriding this on a case by case basis, run:
$ git config --global url."ssh://<username>@gerrit.wikimedia.org:29418/".insteadOf "https://gerrit.wikimedia.org/r/"
You also need to have your ssh keys in
~/.ssh
.
Gerrit
To submit changes, use
cd
to navigate to your extensions folder. Then follow the instructions on
submitting a patch
via gerrit.
Troubleshooting
- Check PHP version and settings
- http://127.0.0.1:8080/info.php
- Edit LocalSettings.php?
- First, check that there is no role (
vagrant list-roles
) that already does what you need. If not, create a file in
settings.d/
directory. See README and 00-debug.php-example file.
- Update MediaWiki code?
- The easiest is to use
vagrant
 git-update
from the host. Or, to just update the code without dependencies, you can use regular
git
fetch
,
pull
, etc. commands in
vagrant/mediawiki
and
vagrant/mediawiki/extensions/
SomeExtension
directories. You can run these commands on the virtual machine, but the file access will be faster on the host machine. MediaWiki-Vagrant pulls code from git master when you initially set up and/or add a role, but doesn't automatically update code after that.
- Run MediaWiki PHP interpreter
- ssh to vagrant and run
mwscript eval.php
. You might need to run it with
sudo
- Run MediaWiki SQL interpreter
- ssh to vagrant and run
mwscript sql.php
. You might need to run it with
sudo
- Update virtual machine software packages?
vagrant provision
does not update system packages in the VM. When you connect with vagrant ssh the login message will inform that you:
NN packages can be updated.
NN updates are security updates.
In vagrant ssh:
- to update all packages, enter
sudo apt-get update && sudo apt-get upgrade
- for "automatic installation of security (and other) upgrades", similar to Cloud VPS instances, enter
sudo unattended-upgrade
- to update to the same packages that are on production WMF servers...
TODO
- Customize Vagrant
- You should never need to change Vagrantfile directly. There are several aspects of vagrant you can customize:
- Core settings (git user, ports, ram, ip, port forwarding) can be customized via .settings.yaml file. See
vagrant config --help
and
vagrant forward-port --help
for instructions. So for example you may run
vagrant forward-port 1234 80
to enable port forwarding from host:1234 to guest:80.
- Perform additional steps after Vagrantfile load by creating a file called
Vagrantfile-extra.rb
and placing it in the same folder as Vagrantfile - it will be automatically loaded. In case of conflict, values in the 'extra' file will supersede values in this file. See example in support/ directory.
- Add custom Puppet code?
- This is ideal if you want to work on your own MediaWiki site locally and let the MediaWiki-Vagrant install your dependencies for you. It's ideal if you have your own fork. There is a distinction between a role and this use case. Roles are meant to be installed in any order and without breaking. If your fork needs different calls and get in trouble with roles, create your own class and call what you need, including roles.
- To do so, place your custom puppet code in
puppet/modules/local/manifests/myown.pp
with your own class, like so:
class
 local::myown
 {

    include
 ::role::svg
}
To apply your class, add it to the "classes" key in
puppet/hieradata/local.yaml
.
You can create the file if it doesn't exist.
Then run
vagrant provision
to apply the change via Puppet.
- Update MediaWiki-Vagrant itself?
- (For example, to use new roles.) In a terminal, change to the vagrant directory on the host computer and enter a regular
git
command such as
git pull --ff-only
. You will typically want to run
vagrant provision
after updating to apply any new puppet changes to your virtual machine.
- Run GUI applications on the virtual machine?
- If you have an X server installed, SSH into the virtual machine using
ssh -- -X
to enable X forwarding. (Mac users should
update to the latest version of XQuartz
.)
- As an alternative, you can run the virtual machine in GUI mode, which allows you to interact with the VM as though it had a physical display. To enable GUI mode, create a file called
Vagrantfile-extra.rb
in the root repository folder, with this as its content:
Vagrant
.
configure
(
'2'
)
 do
 |
config
|

    config
.
vm
.
provider
 :virtualbox
 do
 |
vb
|

        vb
.
gui
 =
 true

    end

end
- Save the file and run
vagrant halt
followed by
vagrant up
. The virtual machine's display will appear in a window on your desktop.
- Adjust the resources allocated to the VM?
- If you'd like to allocate more or less CPU / RAM to the VM, see
vagrant config --help
for instructions.
Alternatively, you can do it by creating Vagrantfile-extra.rb (see support/ dir for an example):
Vagrant
.
configure
(
'2'
)
 do
 |
config
|

    config
.
vm
.
provider
 :virtualbox
 do
 |
vb
|

        # See http://www.virtualbox.org/manual/ch08.html for additional options.

        vb
.
customize
 [
'modifyvm'
,
 :id
,
 '--memory'
,
 '768'
]

        vb
.
customize
 [
'modifyvm'
,
 :id
,
 '--cpus'
,
 '2'
]

    end

end
- Change the editor used for git commit messages?
git
 config
 --global
 core.editor
 "vim"
- Setup a custom hostname?
- Go to
Horizon
, choose
Web Proxies
, and enter a DNS hostname, say <hostname>
View your new wiki at "http://<hostname>/wiki/"
- Make the custom hostname point to homepage of my vagrant role instead of wiki homepage?
- Create a local.yaml file in the /vagrant/puppet/hieradata directory. In it, add:
<rolename>::vhost_name:<hostname>
role::mediawiki::hostname:
 localhost
Run
vagrant provision
.
- Run a branch of MediaWiki other than master?
- Set the "
mediawiki
::
branch
" key in
puppet/hieradata/local.yaml
. You can create the file if it doesn't exist.
mediawiki::branch:
 "wmf/1.24/wmf18"
This change has to be made BEFORE running
vagrant up
for the first time.
If you decide you want to do it later, make the change, destroy your current VM with
vagrant destroy -f
, delete your existing mediawiki checkout and finally build a new VM with
vagrant up
.
Vagrant is designed to run with the master branch, and may not work perfectly, or at all with older versions of core and/or extensions
[5]
.
For the MediaWiki 1.35 release branch, it requires some modification to adjust PHP version requirements that are currently not met. See
Topic:W05qhsn58ztktod8
for instructions.
Advanced usage
MediaWiki settings
As an alternative to managing all MediaWiki settings in a single, large
LocalSettings.php
file, consider grouping your configurations by component or theme, and creating a separate PHP file in
settings.d/
for each group.
This makes it quite easy to keep your settings organized, to temporarily disable specific configurations, and to share settings with others.
MediaWiki will automatically load any PHP files in
settings.d/
in lexical order.
You can control the order in which your configurations are set by adopting the habit of adding a two-digit prefix to each file name.
For example:
    settings.d/
    ├── 10-RunFirst.php
    ├── 20-SomeExtension.php
    └── 99-RunLast.php
Note that the settings files in
settings.d/puppet-managed
are automatically created and destroyed in response to your
Puppet
configuration. Don't put your custom settings there, because Puppet will erase or override them. Keep your custom settings files in
settings.d/
instead.
Vagrant flags
vagrant config --list
display a list of all current Vagrant flags.
After the initial
./setup.sh
, in your vagrant directory, you can then set one of the vagrant flags that appears in the config list, e.g.
vagrant config nfs_shares no
Job queue
If you're testing something that needs to churn the
job queue
, you may need to increase the number of job runners. Currently this is not available through LocalSettings.php, but must be set in the config file for the job runner.
- Open
puppet/modules/mediawiki/templates/jobrunner.json.erb
- Change the value for the '
runners
' key from
1
to the desired value (say,
4
)
- Re-provision with
vagrant --provision
- Beware this will be a difference from the git master in your code
See
instructions above for adjusting CPU core count
appropriately (highly recommended for CPU-bound task such as video transcoding).
Additional storage space
By default, there is relatively little free space on the root partition within the VM. If you plan to test uploading and processing of large image and video files, this may be insufficient.
Manual steps:
- Shut down the VM (
vagrant halt
)
- Open VirtualBox Manager
- Select the VM and go into Settings
- Under Storage, select "Controller: SATA" and click the "Add hard disk" icon.
- Select the default disk image type.
- Name the disk 'VagrantImageSpace' or similar, and give it enough space (say, 80GB) -- by default the file will start small and expand to actual usage, so give as much space as you might need
- Close out the dialogs and restart the VM (
vagrant up
)
- Run
vagrant ssh
to get a shell inside the terminal
- Run
sudo fdisk /dev/sdb
to set up new partitions...
- Type
n
,
p
,
1
, and hit (enter) twice for default size
- Type
w
to save the partition table
- Run
sudo mke2fs /dev/sdb1
to create the filesystem
- Run
sudo vi /etc/fstab
to edit the mounts list
- Add line at end:
/dev/sdb1 /srv/images ext4 errors=remount-ro 0 2
- save out
- Run
sudo mount /srv/images
to mount the filesystem
- Run
sudo chown www-data:www-data /srv/images
to set the file permissions
- Exit the shell
exit
- Reboot the VM (
vagrant halt; vagrant up
)
Authoring roles
The virtual machine created by MediaWiki-Vagrant resembles Wikimedia's production environment in key respects, and it uses the same tool?
Puppet
?that Wikimedia's technical operations team uses to manage production servers and
Wikimedia Cloud VPS
instances.
Puppet is a configuration management tool that provides a domain-specific language for expressing software configurations in a declarative fashion.
Files containing Puppet code are called 'manifests'.
When Puppet runs, it interprets the manifests you feed it and configures the machine accordingly.
A Vagrant role is a set of Puppet manifests.
MediaWiki-Vagrant's Puppet codebase contains abstractions that make it easy to automate the configuration of MediaWiki extensions and related software.
If you are a developer working on a software project that relates to MediaWiki, you are encouraged to submit a patch with a Puppet role for your project.
Adding a Vagrant role for your project makes it easy for other developers to check out your work.
Using a managed virtual machine as a development sandbox for your project reduces the chance of "works-on-my-machine" errors that often result from geographically remote developers working in incompatible environments.
The easiest way to get started with custom roles is to look at how existing roles are implemented in
puppet/modules/role/manifests/*.pp
.
These roles depend on Puppet modules in
puppet/modules
(usually,
foo::bar { ... }
translates to a call to
puppet/modules/foo/manifests/bar.pp
) and use files and templates from the other
puppet/modules/role/*/rolename/
directories.
The Puppet code is generally well-documented and contains examples that demonstrate its proper usage.
Some of the more useful puppet modules are:
Setting up an instance on Cloud VPS
You can use
MediaWiki-Vagrant in Cloud VPS
to install MediaWiki on a
Wikimedia Cloud VPS instance
and enable MediaWiki-Vagrant roles in it.
Bugs
If you spot a bug in MediaWiki-Vagrant, please report it.
First, make sure the bug is not a known Vagrant or VirtualBox bug by searching the
Vagrant issue tracker on GitHub
and the
VirtualBox bugtracker
.
If it is not, go ahead and
submit a bug report
to
Wikimedia Phabricator
.
Clearly describe the issue and include steps to reproduce, whenever possible.
Links
Notes